
Best Sildur's Shaders Settings for FPS and Quality
A repeatable way to balance image quality, frame time, and GPU load across Vibrant, Enhanced Default, and Basic.
The best Sildur's Shaders settings are not one universal list. Vibrant, Enhanced Default, and Basic use different effect budgets, while resolution, GPU, render distance, resource packs, Distant Horizons, recording, and mod load can change the result more than a single option.
This guide separates preset choice from fine tuning. First select a sensible family and preset. Then use three practical profiles, adjust the expensive controls in a fixed order, and confirm the result with a repeatable test instead of judging one easy indoor scene.
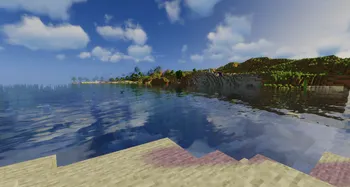
Use one clear FPS and quality target
Start with a profile, not random toggles. These are conservative baselines at 1080p; higher resolutions and distant-rendering mods need more headroom.
| Goal | Preset baseline | Shadow and effects | World settings | Use when |
|---|---|---|---|---|
| Performance | Basic Fast, Enhanced Fast, or Vibrant Lite | Low/medium shadows; low volumetrics; simple reflections | 8-10 chunks; normal clouds | Integrated graphics, laptops, modpacks, recording |
| Balanced | Enhanced Fancy or Vibrant Lite/Medium | Medium shadows; selective reflections; medium volumetrics | 10-14 chunks; moderate simulation distance | Most dedicated GPUs and survival play |
| Quality | Vibrant High or Extreme | High shadows; full reflections; higher volumetrics | 12-16 chunks only with stable frame time | Screenshots, powerful GPUs, controlled scenes |
Treat the profile as a baseline. A stable 60 FPS with even frame pacing is usually better than an average of 80 FPS that repeatedly drops during chunk loading, rain, forests, or water-heavy views.
If the baseline already misses your target, change the preset before spending time on dozens of individual controls. Presets move several related quality levels together and provide a cleaner diagnostic.
Choose settings that match the Sildur family
The three families are not a single quality ladder. Pick the visual direction first, then tune inside that family.
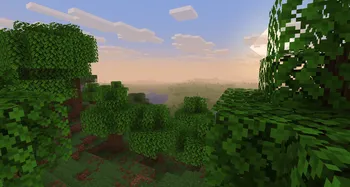
Basic Fast or Fancy
Use Basic when color, light shadows, depth of field, or motion blur matter more than a full lighting rewrite.
- Start with Fast for competitive or heavily modded play.
- Use Fancy only after the same scene remains smooth.
- DoF and Motion Blur are specialist builds, not universal upgrades.
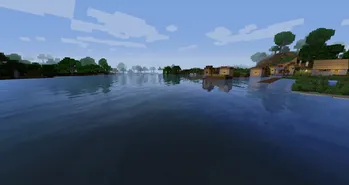
Enhanced Default Fast or Fancy
Choose Enhanced Default for improved shadows, water, sky, and atmosphere without the strongest Vibrant effects.
- Fast is the safer baseline for modest GPUs.
- Fancy is useful when shadows and water remain stable.
- Keep vanilla readability before raising effect quality.
Vibrant Lite to Extreme
Vibrant provides the widest visual range and the most settings worth tuning for reflections, bloom, fog, clouds, and volumetric light.
- Lite or Medium is the practical gameplay baseline.
- High and Extreme need measurable GPU headroom.
- High-MB and Extreme-VL serve specific visual goals.
Lower the expensive settings first
Use the same scene and change one group at a time. Save a screenshot or note the frame-time range before each change so you can reverse settings that cost image quality without helping performance.
- Confirm the correct GPU and loader.Make sure Minecraft uses the dedicated GPU and that Iris/Sodium or OptiFine matches the Minecraft version before tuning the shader.
- Choose a lighter preset.Move from Extreme to High, Medium, or Lite before disabling many unrelated effects individually.
- Reduce shadow quality and resolution.Shadows are often one of the largest costs. Lower resolution or distance until movement around trees and buildings becomes even.
- Lower volumetric light, fog, and clouds.These effects are expensive in sunrise, rain, Nether, End, and long outdoor views. Reduce samples or quality first.
- Simplify reflections and water effects.Screen-space reflections, water detail, and reflective blocks can create large scene-dependent drops.
- Disable depth of field and motion blur for gameplay.They are useful for specific screenshots or cinematic movement but rarely improve normal control or visibility.
- Reduce render distance and distant terrain.Try 8-12 chunks before blaming the shader. Distant Horizons and Voxy add separate CPU, GPU, and memory work.
- Check resolution, resource packs, and recording.1440p, 4K, high-resolution textures, capture software, and browser overlays can consume the headroom the shader needs.
Test settings in the world you actually play
A menu FPS number is not enough. Benchmark a route that includes the situations that normally cause drops.
Use the same Minecraft profile, world seed, location, time, weather, camera direction, resolution, render distance, and resource pack. Wait for nearby chunks to finish loading, then walk the same route for two or three minutes.
Include a forest, village, water surface, transparent blocks, rain or clouds, and a long-distance view when possible. Watch the low sustained FPS and frame-time spikes, not only the highest number.
After finding a stable result, restart Minecraft and repeat once. A configuration that survives a restart, dimension change, and normal exploration is more trustworthy than one short test.
- Record Minecraft, Java, Iris/OptiFine, Sodium, shader version, preset, GPU, and driver.
- Keep resolution and render scale identical.
- Wait for chunk generation before measuring.
- Compare frame time as well as average FPS.
- Test rain, water, forests, and long views.
- Leave 10-20% GPU headroom for busy scenes.
Match the symptom to the first setting to change
Do not reset everything at once. Use the symptom to choose the smallest useful test.
| Symptom | First change | Then check | Avoid |
|---|---|---|---|
| Low FPS everywhere | Lighter preset and lower shadow quality | Resolution, dedicated GPU, resource pack | Changing every toggle together |
| Drops near water or glass | Reduce reflections and water quality | Transparent blocks, resource packs, driver | Assuming render distance is the only cause |
| Stutter while exploring | Lower render/simulation distance | Chunk generation, mods, CPU, storage | Judging only a stationary scene |
| Drops at sunrise, rain, fog | Lower volumetrics and cloud quality | Weather effects and shadow distance | Using an indoor benchmark |
| Black screen or compile error | Test a clean profile and matching loader | GPU driver, conflicting render mods, logs | Trying to tune FPS before fixing compatibility |
Sildur's Shaders settings FAQ
What are the best Sildur's Shaders settings for FPS?
Start with Basic Fast, Enhanced Default Fast, or Vibrant Lite; use 8-10 chunks; lower shadow quality, volumetric effects, reflections, and clouds; then test the same route. The best result is the lightest combination that preserves the look you value.
Should I use Vibrant Lite or Medium?
Use Lite when frame-time stability is the priority. Try Medium only after Lite stays smooth in forests, rain, water, and chunk-heavy travel with useful GPU headroom.
Which setting usually improves FPS the most?
Preset level, shadow quality, volumetric quality, reflections, render distance, and resolution usually matter most. The exact winner depends on the scene and GPU.
Does allocating more RAM improve shader FPS?
More memory can help an undersized or heavily modded profile, but shader rendering is often limited by GPU load, resolution, effects, or frame-time spikes. Excessive allocation can also lengthen garbage-collection pauses.
Are Iris settings different from OptiFine settings?
The shader option names come from the pack, but the surrounding video, performance, and compatibility controls differ. Keep one clean loader profile while comparing results.
Can I copy settings between shader versions?
Record important values, but do not blindly copy an old options file after a major update. Defaults, option names, and rendering behavior may change.
Official references used for this guide
The screenshots and release facts were checked against the author-published Modrinth projects on July 15, 2026. Performance recommendations remain starting points because hardware and mod combinations vary.
- Sildur's Vibrant Shaders on Modrinth — current 2.01 files and official gallery
- Sildur's Enhanced Default on Modrinth — current 1.19 files and official gallery
- Sildur's Basic Shaders on Modrinth — current 2.6 files and official gallery
Start with a preset, then tune by evidence
For most players, the best Sildur's Shaders settings begin with Basic Fast, Enhanced Default Fast, or Vibrant Lite/Medium. Choose the family that already matches your preferred look before fine tuning.
Reduce shadows, volumetric effects, reflections, distant terrain, and resolution in a repeatable order. Keep the changes that improve the difficult scenes you actually play, not the ones that only raise an easy benchmark.