
Best Minecraft Shaders for Low-End PCs
A practical comparison of Sildur's lightweight presets, with a hardware-first setup order for smoother frame times instead of unrealistic FPS promises.
The best Minecraft shaders for a low-end PC are not simply the packs with the smallest ZIP. Resolution, render distance, GPU type, memory bandwidth, loader, mods, and the scene being rendered all affect performance. This guide compares the current verified releases: Basic 2.6, Enhanced Default 1.19, and Vibrant 2.01.
Treat the recommendations as starting points, not guaranteed frame rates. Test in your normal survival world at the resolution you actually use. A stable 45 FPS with even frame delivery usually feels better than a counter that jumps between 30 and 90 FPS.
Which Minecraft shaders are best for a low-end PC?
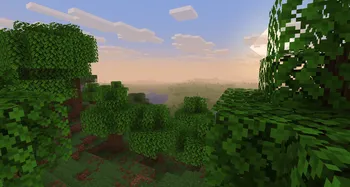
For Minecraft shaders on a low-end PC, the safest Sildur order is Basic Fast, Enhanced Default Fast, then Vibrant Lite. Move up only after the lighter option stays smooth in normal gameplay.
Sildur's Basic Fast
The lightest starting point for integrated graphics, old laptops, or modded instances that already use much of the frame budget.
- Use Fast for normal play; Fancy adds a little more visual weight.
- DoF and Motion Blur are specialist variants, not faster upgrades.
- If Basic Fast stutters, fix resolution, render distance, loader, or drivers before trying a heavier pack.
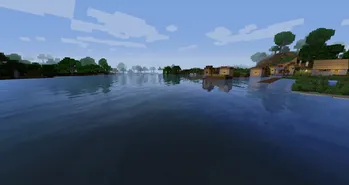
Enhanced Default Fast
Keeps Minecraft's vanilla style while adding better shadows, water, clouds, and atmosphere. It is the next step when Basic runs comfortably.
- Fast is the low-end preset; Fancy should be tested later.
- Usually easier to read in survival than a strongly stylized shader.
- A sensible option for modest dedicated GPUs and stronger integrated graphics.
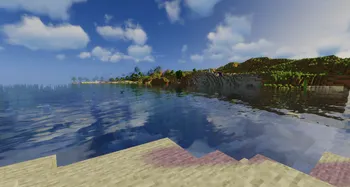
Vibrant Lite
Adds the strongest lighting transformation, but volumetrics, reflections, shadows, and post-processing make it the most demanding family here.
- Choose Lite first and leave Medium or higher for faster GPUs.
- Lower volumetric lighting and shadows before sacrificing every effect.
- Best for a dedicated GPU that still needs a conservative preset.
Choose a preset by GPU and target
These tiers are conservative starting points for 1080p. Higher laptop resolutions, heavy modpacks, Distant Horizons, recording, and large render distances require more headroom.
| Typical hardware | Start with | Target | Move up when |
|---|---|---|---|
| Intel UHD / older integrated GPU | Basic Fast | 30-45 stable FPS | Frame time stays even at 8-10 chunks |
| Modern integrated GPU / entry dedicated GPU | Basic Fancy or Enhanced Fast | 45-60 FPS | Normal exploration has no repeated stalls |
| GTX 1050-class / modest dedicated GPU | Enhanced Fast or Vibrant Lite | 50-60 FPS | GPU usage leaves headroom for chunk loading |
| Stronger dedicated GPU but CPU-limited Minecraft | Vibrant Lite | Stable frame time | Lower render distance no longer changes GPU-bound scenes |
At 2560×1440 or a high-density laptop display, render scale can matter more than the preset name. Test 1920×1080 or a lower render scale before disabling every visual feature.
Do not compare results from a quiet indoor room with a forest, ocean, rainstorm, or long-distance view. The harder scene is the useful benchmark.
Lower these settings before abandoning shaders
Change one group at a time and retest the same location. This makes it clear which option actually helps.
- Reduce render distance.Start around 8-10 chunks on a weak system. Chunk updates can cause stutter even when average GPU FPS looks acceptable.
- Lower shadow quality or resolution.Shadows are often one of the clearest wins while preserving the pack's style.
- Reduce volumetric lighting, reflections, and clouds.These matter especially in Vibrant Lite and weather scenes.
- Disable expensive presentation effects.Turn off depth of field, motion blur, lens flare, and heavy anti-aliasing when they do not serve normal gameplay.
- Check resolution and render scale.A high-resolution laptop panel can overwhelm an otherwise reasonable preset.
- Keep GPU headroom.Leave room for new chunks, mobs, rain, interfaces, and background apps.
How to measure whether a shader is actually playable
Use the same world, location, weather, time of day, camera direction, render distance, and resolution for every comparison. Let chunks finish loading, then walk and turn through the scene.
Watch frame-time consistency as well as average FPS. Short repeated pauses can feel worse than a lower but steady number.
Test for several minutes in the activities you normally do: exploration, building, combat, farms, multiplayer, or modded dimensions. Record the lowest sustained range, not the highest number while standing still.
If every preset performs poorly, test a clean Iris and Sodium profile. A conflicting mod, outdated driver, wrong GPU assignment, or oversized resolution may be the real bottleneck.
Best Minecraft shaders for low-end PC FAQ
What are the best Minecraft shaders for a low-end PC?
Sildur's Basic Fast is the safest first test for a low-end PC. Use a practical resolution, 8-10 chunks, and a clean Iris profile before moving to Enhanced Default Fast or Vibrant Lite.
Is Vibrant Lite good for low-end PCs?
It can work on a modest dedicated GPU, but it is more demanding than Basic Fast or Enhanced Default Fast.
Does Iris give more FPS than OptiFine?
Iris with Sodium is usually the cleaner modern performance baseline, but results vary by version, mods, driver, and hardware.
How much RAM do shaders need?
Shaders mainly stress the GPU. Allocating excessive RAM does not fix a weak GPU.
Should I use Distant Horizons on a low-end PC?
Only after the shader is stable without it. Start with conservative distance and quality settings.
Start light, test honestly, then add effects
For most low-end systems, Basic Fast is the correct first download. Enhanced Default Fast is the best balance once the system has headroom, while Vibrant Lite is for players who can spend more performance on dramatic lighting.
The winning setup is the one that remains stable in your real world, not the preset with the most effects or the largest peak FPS number.